
Write data to an XLS file without Excel
Problem scenario:
My goal is to transfer this data to Excel, such that each time the user hits "print" on the scale indicator, a new row is appended to an existing Excel file that contains the data.
Requirements:
- Data Logger Suite Professional, Enterprise, or a trial version;
- Excel Export Pro
It is assumed that:
You've prepared parser items for export. For this tutorial, all items were prepared in the previous part.
We've selected the "Excel Export Pro" plugin because the main advantages are:
- It can create XLS files without Excel installed.
- It can write column headers and format cells as you want.
Also, you may read other examples:
Solution:
All parser items are now ready for export using the "Excel Export Pro" plugin. Please, open the configuration window of the "Excel Export Pro" plugin (fig.1) by selecting the module in a list and clicking the "Setup" button on the "Data export" page.
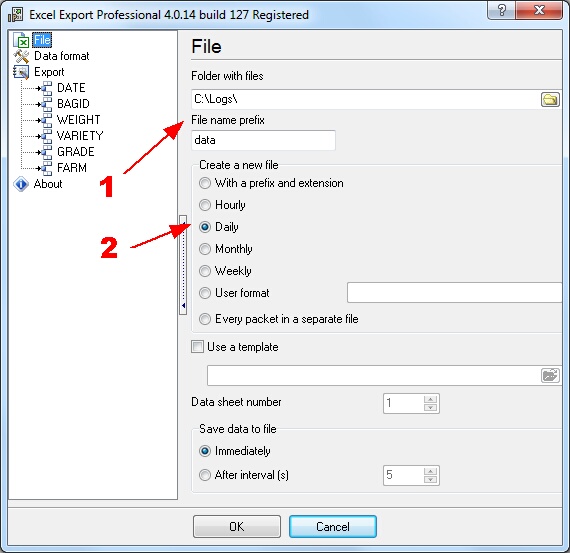
Fig.1. Excel file settings.
First of all, select options in field #1 and field #2. These options will allow you to create a new XLS file every day in the "C:\Logs" directory with the "data" name. The name will contain the date too.
Note: We recommend splitting Excel files by date or time because large files will slow down the logger. The optimal file size is up to 1000 rows. Also, if your data goes fast (several Excel rows per second), then you may optimize program performance by saving data to the file after some interval.
The next "Data format" page (fig.2) is used to specify export format settings for parser items with a different data type. On this page, we need to configure the format for a date and time.
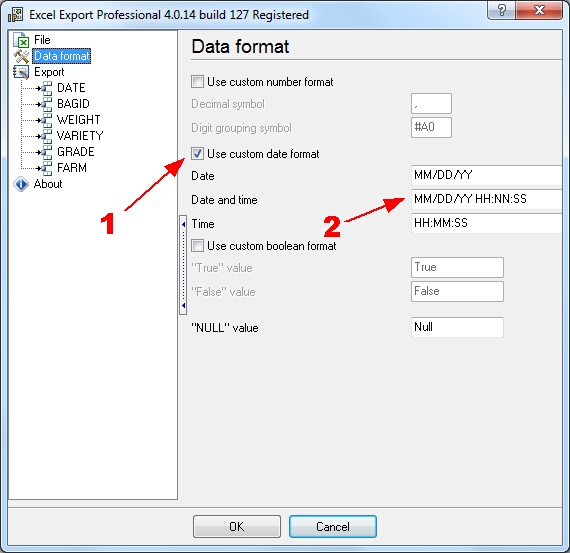
Fig.2. Format settings.
The next "Export" page (fig.3) is vital. On this page, you may add all parser item which you want to write to Excel file. If the list on this page is empty, the plugin will ask you to add all existing parser items. The "Action" button allows you to add, remove, or move parser items.
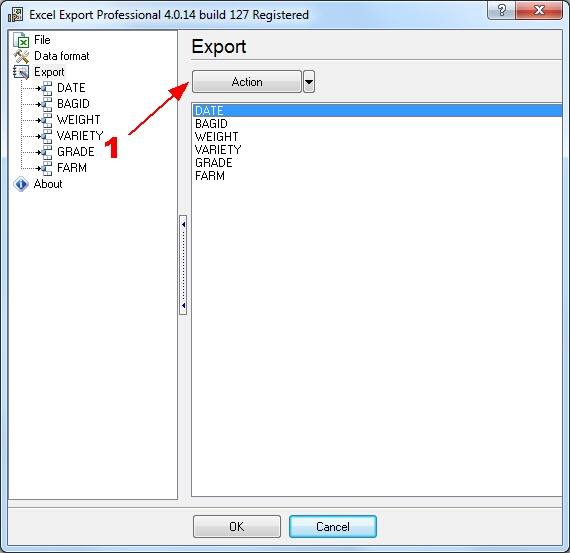
Fig.3. Parser items.
By clicking the item name in the tree (fig. 4, pos #1), you may define configure the export settings for each parser item. Initially, specify the starting cell for the selected parser item (fig.4, pos. #2).
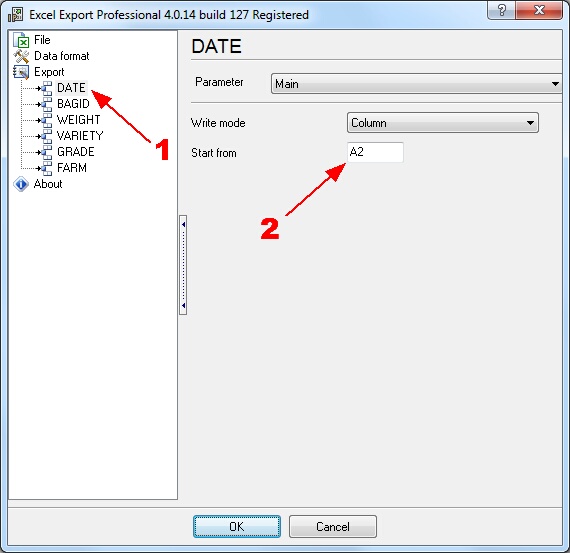
Fig.4. Parser item. Start cell.
Second, specify the header for the parser item (fig. 5, pos. 1). If you want, you may define a custom font for the column title (fig. 5, pos. 2).
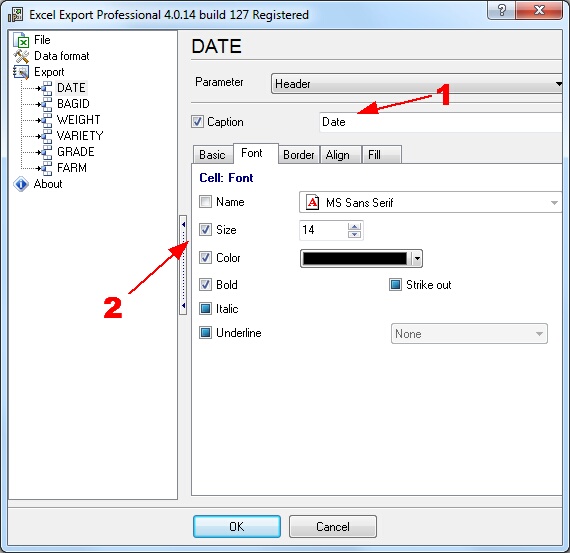
Fig.5. Parser item. Header.
"Value" and "Formatting" pages are not used in this tutorial, and fully described in the help file.
Repeat two steps above for each parser item.
Click the "OK" button and close the "Excel Export Pro" plugin configuration window and the "OK" button in the options window.
Okay, all settings have been completed, and we are ready to capture data to an Excel file.
If the data export module and the parser had been correctly set up, then you should see a new Excel file in the destination directory when you'll receive a new portion of data.
Related articles: Write data to an XLS file without Excel
- RS232 to Excel. Four methods to send data from RS232 to Excel Plugins: Various
- Write data to an XLS file without Microsoft Excel installed Plugins: Local database
- Send data to Excel through the DDE interface Plugins: DDE Server
- Export data and charting in Excel in real-time Plugins: Direct Excel Connection
- Write data to a CSV text file Plugins: Local database, DDE Server
- Export real-time data and charting in OpenOffice or LibreOffice Calc Plugins: Direct OpenOffice/LibreOffice Connection
- Write data to an XLS file without Excel Tags: advanced export, rich formatting, many options. Plugins: Excel Export Pro
- Write data to an XLS file without Excel Tags: variant #2. Plugins: Local database