SMS to database: Writing short messages from a GSM modem into a database. Part II
Configuring how to write data to the database
You may choose between two modules to write data with:
ODBC database - it is free, but it cannot save the text message at the moment when there is no connection to the database
SQL Database Pro - it requires a separate license, but it offers some professional features the ODBC database lacks.
Note: The program installation wizard can automatically create the configuration for these modules matching the offered table structure.
Configuring the process of writing data to a database with the ODBC database- Select the module in the list of data export modules
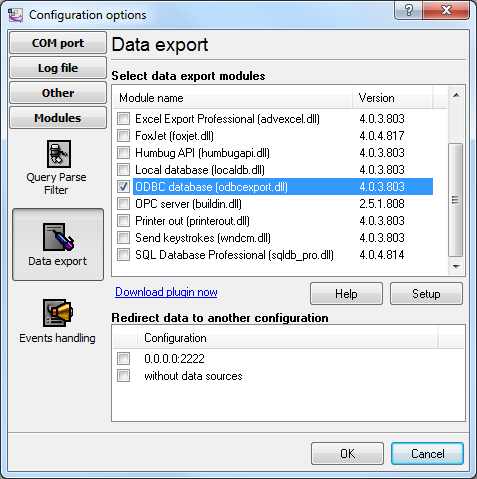
Fig. 9. Selecting the data export module
- Enable writing to the database
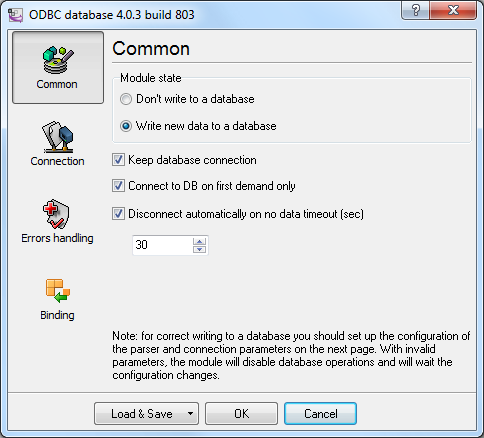
Fig. 10. Enable writing to the database
- Configure a connection to the database: select the ODBC connection and specify advanced settings. If the ODBC connection is not created yet, click Configure. You can find more details about all options and the configuration process in the help file of this module.
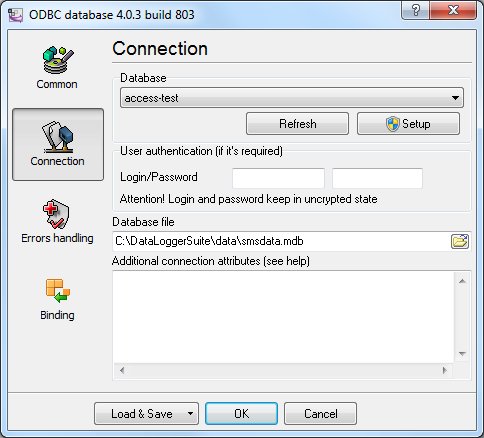
Fig. 11. Configuring the connection
- Link parser items to the columns of the table from the database: import the table description from the database (the Import button) and link the necessary columns. You should either delete unlinked columns from the tree or specify the default values for them.
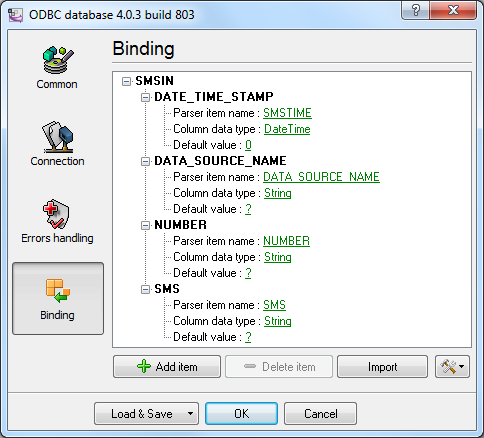
Fig. 12. Linking items and columns
- If everything is configured correctly, you will see the message about values successfully written to the database in the main window of the program.
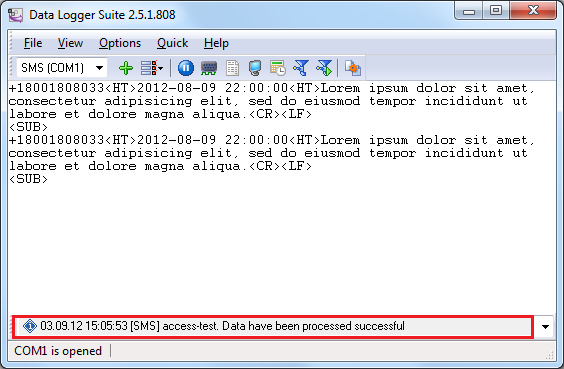
Fig. 13. Message about data successfully written to the database
Configuring the process of writing data to a SQL Server 2008 database with SQL Database Pro
The configuration of this module may require the knowledge of your database SQL dialect. First, you should create a table in the database and assign permissions for writing to it.
- Select the module in the list of data export modules.
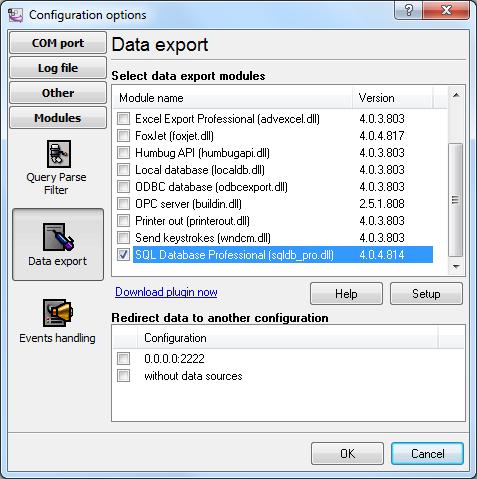
Fig. 14. Selecting the SQL Database Pro module
- Enable writing to the database
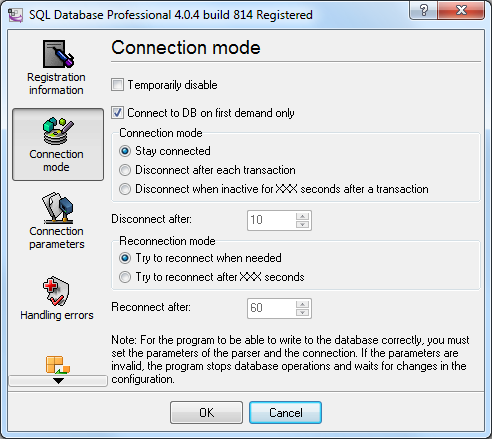
Fig. 15. Enabling writing to the database in the SQL Database Pro module
- Configure a connection to the database: Select the database type and specify the connection settings. You can find more details about all options and the configuration process in the help file of this module. Figure 16 shows a connection string for the database "test" of the Microsoft SQL Express 2008 server located on one computer with the program.
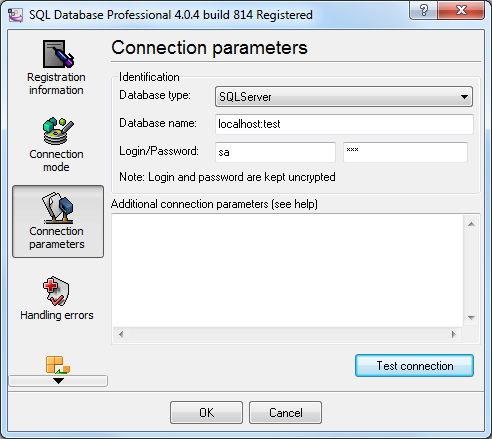
Fig. 16. Connection settings in the SQL Database Pro module
- Add an SQL query to the queue and link the parameters of the SQL query of the :P1 type and the parser items.
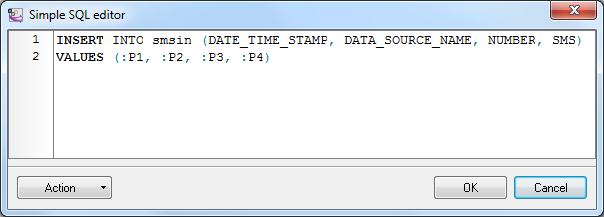
Fig. 17. SQL query
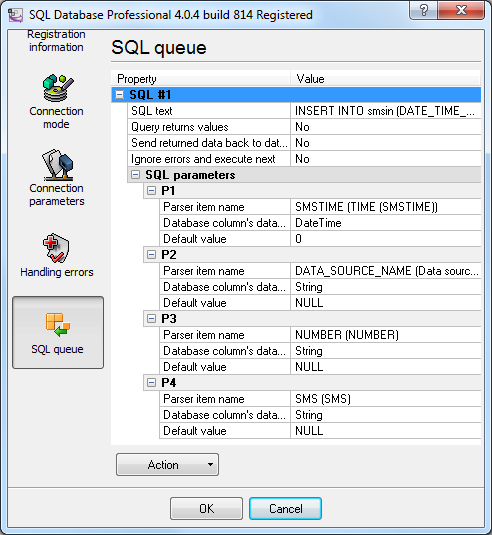
Fig. 18. SQL query settings
- If everything is configured correctly, you will see the message about data successfully written to the database in the main window of the program.
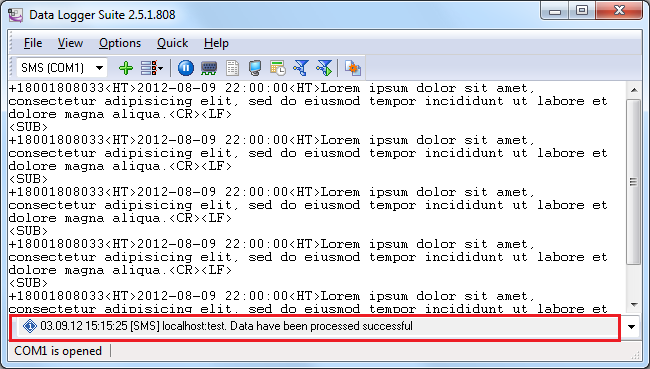
Fig. 19. Message about data successfully written to the database